In the words of Kasabian, “I’m on fiiiiiiiiiiiiiii-rrrrrrrrrrrrre” – I had a brilliant evening last night and even finished one of my hats!

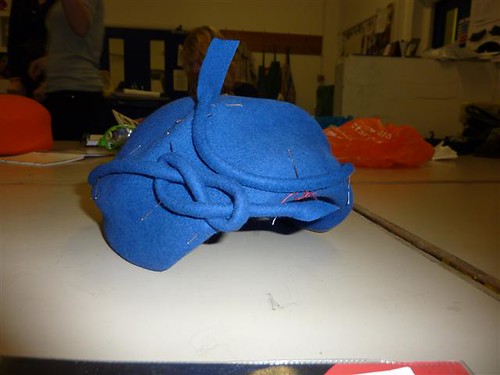
Since last week, I’ve been stitching the cord made from the blue felt as neatly as I possibly can. I’ve also been playing with it – knotting it, twisting it, holding it against the hat, trying to work out what I want to do with it. My favourite was a figure of eight knot, which I steamed into place at the start of the class. I had planned to run the rest of the cord around the hat and weave it back through the knot, but when I pinned everything in place that just didn’t look right. I played around until I had found the right position, pinned it all there and started to make holes to thread the cord through.

I tried that on a scrap first – different shaped holes and how they worked with the felt stuck through them. I found that making a cross shape worked best, as long as the flaps ended up on the wrong side of the fabric. I marked my locations and off I went. It was really scary to make the first cut, but as soon as I started threading the cord through I was thrilled with the effect. I’d decided to thread in and out based on where the shape goes out and it looks (if I may say so myself) fantastic. Finally I stitched the knot and ‘tail’ in place, trimmed the tail and made the ends look funky (devil tails according to someone at work). I’m really really pleased with how it has come out and really proud of myself for doing something a little out of the ordinary for once.


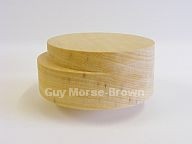
Next up, I started blocking a beret. I hadn’t expected to finish what I was doing so quickly so I ‘borrowed’ a black hood off someone and blocked it. I was really pleased with how well it went – it blocked very quickly and I didn’t have very much hassle with the rolled edge – I managed to shrink the felt into it far quicker and easier than I ever have before. I need to have a think about what I want to do to decorate this one.

And finally, we all made up some samplers of tie-tacking wire to the felt, stitching the wire on with a blanket stitch and covering an edge with petersham. I did all the stitching in contrast colours to make it clear on the samples, but was really proud of myself that I could barely see the stitching on the petersham, even though I’d sewn white thread onto black petersham!!!
So, an incredibly successful week. Next week’s half term so there’s not class, but I intend to use the time to get all my planning, research and design work written up. And an early night on a Monday – it’s a mission getting home from Chelsea!!!


 Since last week, I’ve been stitching the cord made from the blue felt as neatly as I possibly can. I’ve also been playing with it – knotting it, twisting it, holding it against the hat, trying to work out what I want to do with it. My favourite was a figure of eight knot, which I steamed into place at the start of the class. I had planned to run the rest of the cord around the hat and weave it back through the knot, but when I pinned everything in place that just didn’t look right. I played around until I had found the right position, pinned it all there and started to make holes to thread the cord through.
 I tried that on a scrap first – different shaped holes and how they worked with the felt stuck through them. I found that making a cross shape worked best, as long as the flaps ended up on the wrong side of the fabric. I marked my locations and off I went. It was really scary to make the first cut, but as soon as I started threading the cord through I was thrilled with the effect. I’d decided to thread in and out based on where the shape goes out and it looks (if I may say so myself) fantastic. Finally I stitched the knot and ‘tail’ in place, trimmed the tail and made the ends look funky (devil tails according to someone at work). I’m really really pleased with how it has come out and really proud of myself for doing something a little out of the ordinary for once.
 Next up, I started blocking a beret. I hadn’t expected to finish what I was doing so quickly so I ‘borrowed’ a black hood off someone and blocked it. I was really pleased with how well it went – it blocked very quickly and I didn’t have very much hassle with the rolled edge – I managed to shrink the felt into it far quicker and easier than I ever have before. I need to have a think about what I want to do to decorate this one.
 And finally, we all made up some samplers of tie-tacking wire to the felt, stitching the wire on with a blanket stitch and covering an edge with petersham. I did all the stitching in contrast colours to make it clear on the samples, but was really proud of myself that I could barely see the stitching on the petersham, even though I’d sewn white thread onto black petersham!!!