I’ve been thinking more and more about my design and I think that, although I love the look of felt and love working with felt, it just doesn’t have the ‘occasion’ of sinamay. Plus I’m less confident working with sinamay and want to get more practice with it. So I decided that my challenge for last night was to block a two-piece in sinamay.
The problem is that I just don’t like the look of your classic sinamay hat, all mother of the bride and weddings and not what I’m aiming for. I had a wander round John Lewis and Milliner Warehouse for inspiration and decided to make a hat with a felt crown (so I can have another play at manipulation) and a sinamay brim, teaching me how to block that and attach it. To decorate, I’ll add a large flower motif in felt with sinamay swirls and wotnots to bring the two materials together. If it all works out well I’ll wear it to a wedding in January. To bring it in line with the dress, I’ll do decorative topstitching on all the decorative bits in the same colour thread as my dress.
 I picked up a fur felt in chocolate brown and some matching sinamay and was ready to go. Brown’s not really my thing, but I wanted to try manipulating with a fur felt and it was chocolate, pale brown or black. I figured the chocolate will go best with my dress.
First I blocked the brim. I chose and off-centre brim block, not too big, and found out very quickly that blocking a brim in sinamay is a LOT easier than blocking a crown!!! I guess that’s not much of a surprise really as the brim is pretty flat and the crown’s all curved and the sinamay’s flat, but I didn’t expect it to be that much easier. Although I did break my elastic doing it!!! I stiffened it with PVA and popped it in the oven to dry.
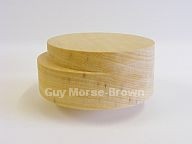 I’d had an idea of a block with a fairly blocky top, kind of like this one from Morse Brown, but there was nothing like that in the cupboard so I decided to manipulate some folds into a dome shaped crown block. To fit the big floral thingy on the side I decided to just manipulate on one side. I have no idea what this is going to look like, but it’ll be exciting to find out.
 I steamed the hood and blocked it on a tall dome shaped crown. Then I put the centre crease in, the two next to it and then started to work down one side. I didn’t like how the front looked so I brought the creases down to form ‘v’s at the front. It’s a lot easier to manipulate the fur than the wool felt and the finished article is a lot more dramatic. I was really pleased with how it came out.
I popped that in the oven and removed the sinamay brim. It’s the last week of term and I’ll miss the first two weeks of next term because I’ll be in India so I have rushed everything off the blocks a lot quicker than I normally would. I hope that won’t affect the finished product too much. I tacked the line on the block that shows the head fitting, but there’s not much else I can do with that until it’s wired. I have found out that I need to cut out the head fitting about an inch in, put in darts and fold up the excess, then stitch it to the crown like that. I’m very nervous about doing that on my own the first time, but I’m sure it’ll be ok.
 So finally I removed the crown from the block and wobbled home overladen with precious very delicate things and getting far too much interest from random people on the tube. I hope to get this finished over the Christmas period – maybe I’ll devote next Monday night to it...
The problem is that I just don’t like the look of your classic sinamay hat, all mother of the bride and weddings and not what I’m aiming for. I had a wander round John Lewis and Milliner Warehouse for inspiration and decided to make a hat with a felt crown (so I can have another play at manipulation) and a sinamay brim, teaching me how to block that and attach it. To decorate, I’ll add a large flower motif in felt with sinamay swirls and wotnots to bring the two materials together. If it all works out well I’ll wear it to a wedding in January. To bring it in line with the dress, I’ll do decorative topstitching on all the decorative bits in the same colour thread as my dress.
 I picked up a fur felt in chocolate brown and some matching sinamay and was ready to go. Brown’s not really my thing, but I wanted to try manipulating with a fur felt and it was chocolate, pale brown or black. I figured the chocolate will go best with my dress.
First I blocked the brim. I chose and off-centre brim block, not too big, and found out very quickly that blocking a brim in sinamay is a LOT easier than blocking a crown!!! I guess that’s not much of a surprise really as the brim is pretty flat and the crown’s all curved and the sinamay’s flat, but I didn’t expect it to be that much easier. Although I did break my elastic doing it!!! I stiffened it with PVA and popped it in the oven to dry.
I’d had an idea of a block with a fairly blocky top, kind of like this one from Morse Brown, but there was nothing like that in the cupboard so I decided to manipulate some folds into a dome shaped crown block. To fit the big floral thingy on the side I decided to just manipulate on one side. I have no idea what this is going to look like, but it’ll be exciting to find out. I steamed the hood and blocked it on a tall dome shaped crown. Then I put the centre crease in, the two next to it and then started to work down one side. I didn’t like how the front looked so I brought the creases down to form ‘v’s at the front. It’s a lot easier to manipulate the fur than the wool felt and the finished article is a lot more dramatic. I was really pleased with how it came out.
I popped that in the oven and removed the sinamay brim. It’s the last week of term and I’ll miss the first two weeks of next term because I’ll be in India so I have rushed everything off the blocks a lot quicker than I normally would. I hope that won’t affect the finished product too much. I tacked the line on the block that shows the head fitting, but there’s not much else I can do with that until it’s wired. I have found out that I need to cut out the head fitting about an inch in, put in darts and fold up the excess, then stitch it to the crown like that. I’m very nervous about doing that on my own the first time, but I’m sure it’ll be ok.
 So finally I removed the crown from the block and wobbled home overladen with precious very delicate things and getting far too much interest from random people on the tube. I hope to get this finished over the Christmas period – maybe I’ll devote next Monday night to it...
No comments:
Post a Comment