 Ok, so my first coat – and I picked up McCall 5513 over the summer in one of the $3 sales (BARGAIN!) I’ve got a few smart coats and an old battered leather jacket, but I really like the current styles and this one is my favourite.
I’d already decided not to do the appliqué on the back – it’s just not my style and to do some funky contrasting stitching on the seams. I picked up some fairly cheap purple wool coating (a GORGEOUS) colour along with some red lining from Fabric Land. I was going to face it in either lighter purple or red, but when I unpacked the purple I realised I’d been sold 150cm wide when I was told it was 115cm wide so I had loads too much so I decided to self-face. I also bought a set of massive red shell buttons (costing almost as much as the fabric).
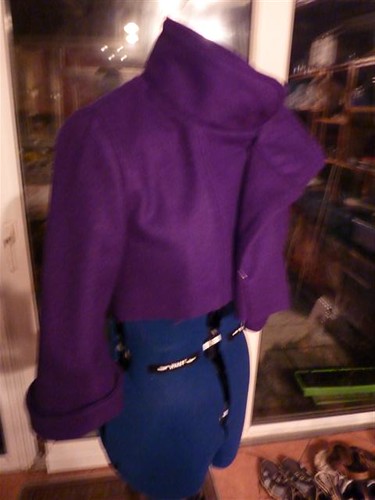 I got it all cut out this week, then after spending most of Saturday re-arranging and cleaning my sewing room I got started on Sunday morning. The bodice went together like a dream. All the easing of the shoulder seams and sleeves slipped into place so easily. I officially love working with wool!!! I did all the topstitching in sparkly red thread which is very exciting (although it does snap at the most inopportune moments). I didn’t change anything really except to topstitch most of the seams (only a select few are stitched in the design and that looked a bit random to me) and to machine the lining onto the shoulder seam rather than hem it and slipstitch it. I’m going to get some red binding for that seam to smarten it up, but it feels fine.
Dark fell (so early – since when has it become NOVEMBER?) and after dinner I got onto the skirt. Now that’s more complicated. First are the dozen or so pleats, the only section so far where the instructions are really lacking. All it says is pleat as shown in the picture. I’d never done pleats before, but with a little help from a book I got them sorted and looking rather smart.
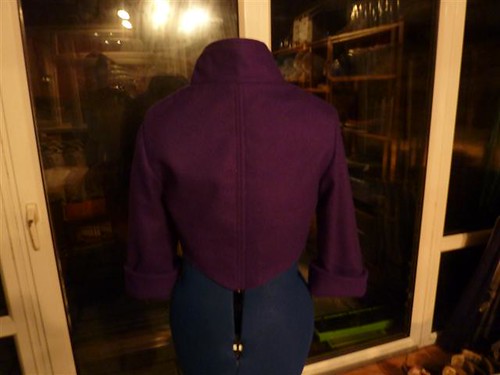 The bottom has to be gathered to about ¼ of its original size which with the wool fabric is hard work. The instructions say to run two lines of stitching along the bottom and use those to gather, but my thread just kept snapping. I ended up unpicking that and, following a review I’d read on patternreview.com I found some thick elastic, cut it to the right size and sewed it on stretched out. Even then I had to manually “squidge” the wool as it went through the machine as it was longer than the full stretch of the elastic!!! Eventually (I must have been working on that seam for 2-3 hours – the first difficult part of the coat) I got it done and stitched to the lining and headed off exhausted to bed. I was really disappointed I couldn’t finish it yesterday (I wanted to wear it today), but I’ll do my best to get it done on Tuesday night. It looks like there’ll be a bit more gathering at the top of the skirt but I’m on instruction 54 of 63 so I’m almost there...
 Since last week, I’ve been stitching the cord made from the blue felt as neatly as I possibly can. I’ve also been playing with it – knotting it, twisting it, holding it against the hat, trying to work out what I want to do with it. My favourite was a figure of eight knot, which I steamed into place at the start of the class. I had planned to run the rest of the cord around the hat and weave it back through the knot, but when I pinned everything in place that just didn’t look right. I played around until I had found the right position, pinned it all there and started to make holes to thread the cord through.
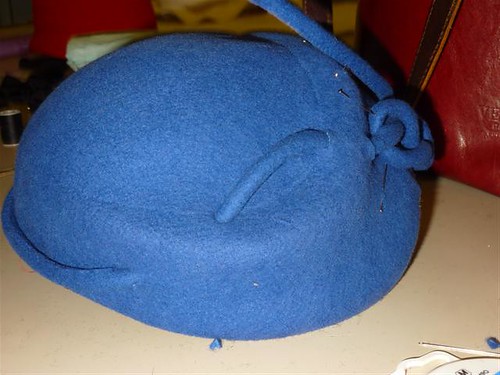 I tried that on a scrap first – different shaped holes and how they worked with the felt stuck through them. I found that making a cross shape worked best, as long as the flaps ended up on the wrong side of the fabric. I marked my locations and off I went. It was really scary to make the first cut, but as soon as I started threading the cord through I was thrilled with the effect. I’d decided to thread in and out based on where the shape goes out and it looks (if I may say so myself) fantastic. Finally I stitched the knot and ‘tail’ in place, trimmed the tail and made the ends look funky (devil tails according to someone at work). I’m really really pleased with how it has come out and really proud of myself for doing something a little out of the ordinary for once.
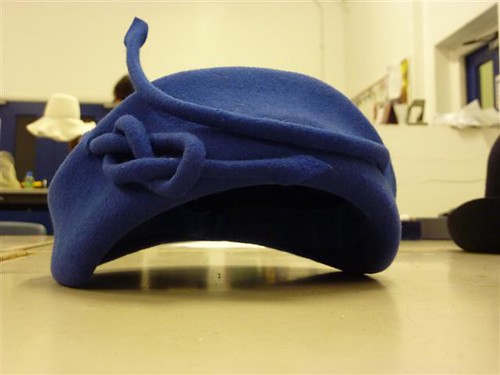
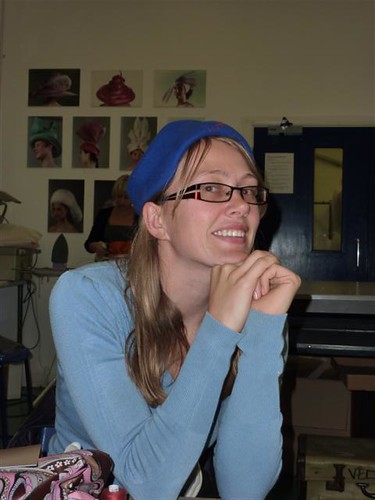
 Next up, I started blocking a beret. I hadn’t expected to finish what I was doing so quickly so I ‘borrowed’ a black hood off someone and blocked it. I was really pleased with how well it went – it blocked very quickly and I didn’t have very much hassle with the rolled edge – I managed to shrink the felt into it far quicker and easier than I ever have before. I need to have a think about what I want to do to decorate this one.
 And finally, we all made up some samplers of tie-tacking wire to the felt, stitching the wire on with a blanket stitch and covering an edge with petersham. I did all the stitching in contrast colours to make it clear on the samples, but was really proud of myself that I could barely see the stitching on the petersham, even though I’d sewn white thread onto black petersham!!!
 Last night we presented our initial ideas for design inspiration for our coursework hats. Mine is the tiny boutique hotel I went to last week for a storytelling event. The atmosphere was fantastic and the plain front door hid the most beautiful and sumptuous interior decorating I've ever seen. Click
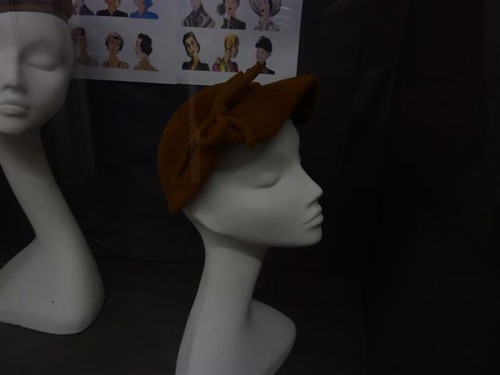
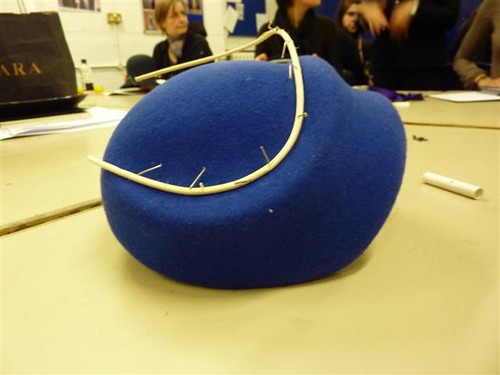
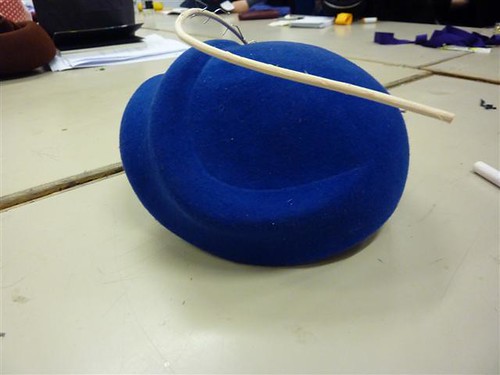
 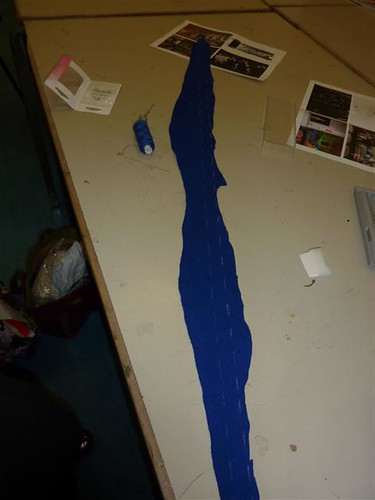 I had decided to take inspiration for this blue hat from a hat on display in the college. A cord has been made from the felt and laced through the hat to make a very sophisticated-looking decoration.
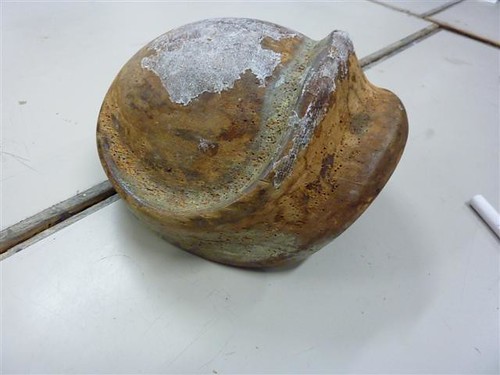
 During the evening, the teacher discussed what we'd be doing during the course, what materials we'll be working with, and said that if we produce really original designs she'll put them forwards for a couple of student competitions which is really exciting and has got me all fired up. There's a list of competition winners for a competition in felt this year and almost all of them are from this college. Plus one of them's on the BTEC course


 The dress is finished!!!


 Got to the market before the stalls were even set up (I couldn't help it, I was excited) and after a walk in the rain got her these two fabrics