Tuesday, 13 October 2009

Project 15 - Bumblebee - PHOTOS

Earthwatch have kindly sent me some pictures of the bumblebee in action. Please click on their link below and see what they do.

www.eathwatch.org/europe

2nd Millinery Course - Week 5

Good morning everyone!!!

Well, it's Tuesday and you know what that means - millinery course update!!!

Last night we presented our initial ideas for design inspiration for our coursework hats. Mine is the tiny boutique hotel I went to last week for a storytelling event. The atmosphere was fantastic and the plain front door hid the most beautiful and sumptuous interior decorating I've ever seen. Click here to have a look at the website.

The ideas in the group are really varied, ranging from taxidermy to exotic flowers to bubbles to pieces of ceramic art. It'll be so exciting to see how they all develop.

Then, with all the inspiration flowing around in the air we got on with our hats. The teacher showed us how to manipulate hats manually, using a plain block to get some really funky effects. I can't wait to have a try of that.

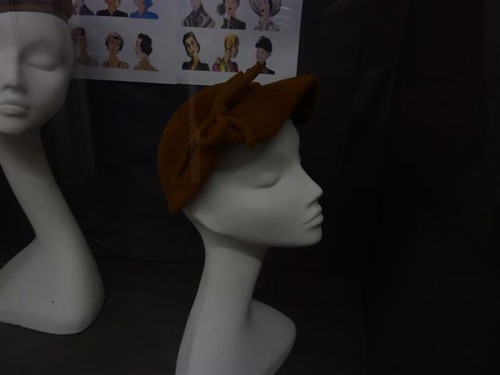
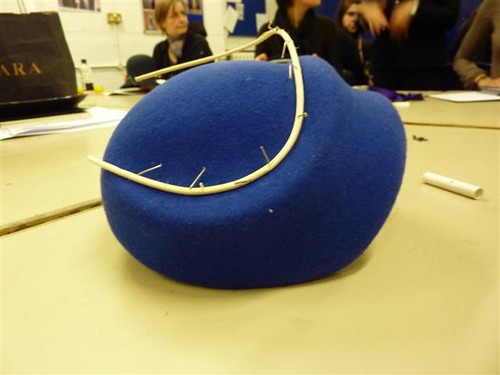
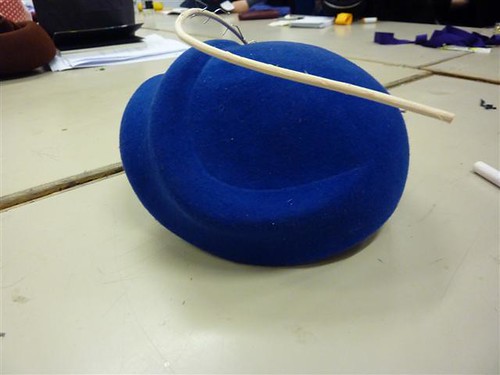
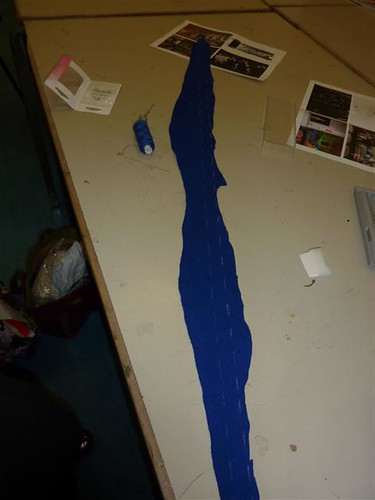
I had decided to take inspiration for this blue hat from a hat on display in the college. A cord has been made from the felt and laced through the hat to make a very sophisticated-looking decoration.

Using a wet pressing cloth, I stretched my remaining felt (cut off in a circle) into a straight line and cut a long strip of it. I started to hand stitch this into a cord. I'm going to get that finished this week so that I can get it attached next week in the class.

Man making hats makes me so HAPPY

Tuesday, 6 October 2009

2nd Millinery Course - Week 4

Good morning everybody and welcome to today's installment in the exciting world of the trainee milliner.

Well, I was in a MUCH better mood last night and had the normal fun that I have on the course the group really is the loveliest to work with - not one person who isn't fully involved, loads of chatter and everyone chatting to everyone else. It's really wonderful.


We started out in the library, researching hat designs, fashion and looking for inspiration for our projects. When that closed, we headed up to the room and got back to our felt hats. Everyone's been going at about the same speed which was great as we were all doing stuff together. I got my hat unpinned, off the block and the head band sewed in by the time we went home. I'm really happy with the shape and spent most of the long train ride home sketching ideas for decorating it. Pictures will follow when I get home.

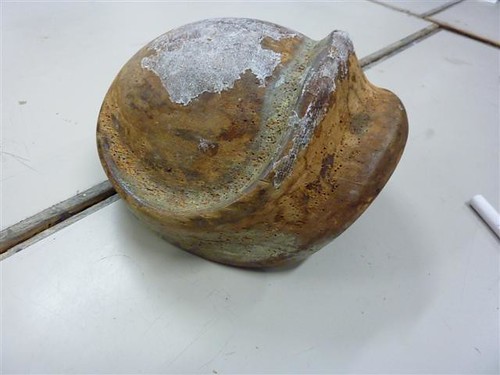
During the evening, the teacher discussed what we'd be doing during the course, what materials we'll be working with, and said that if we produce really original designs she'll put them forwards for a couple of student competitions which is really exciting and has got me all fired up. There's a list of competition winners for a competition in felt this year and almost all of them are from this college. Plus one of them's on the BTEC course

So, my main work for this week is to think of "inspiration". The things I've picked up so far are the autumn leaves around me and (to appease my colleagues) the olympic rings. She's much more keen that we base on a painting or something like that though so we'll see where we end up...I'm keeping my camera on me at all times and my theatre trip on Wednesday may turn into a gallery instead...

Wednesday, 30 September 2009

2nd Millinery Course - Week 3

Well, the jet-lag is finally dispersing and I'm starting to feel human again. I can tell as I spent the train-ride into work this morning with my nose in my note book, oblivious to the world around me and full of ideas

I must admit, Monday did NOT go well. I was tired and grumpy and full of mistakes. Everything went wrong and I made it all worse!

Well, I'd missed the first two weeks as I was on holiday so I got all the hand-outs - three assignments of research, design and make over the length of the course. The other girls on the course are really really lovely and I feel like I've made friends already. One of them had just got engaged at the weekend which was really exciting.

The first few weeks are practical to give everyone a chance to block. Quite a few people have done it before - mainly as they did fashion or design courses at uni. I picked a beautiful block - very small and a one-piece as I'm a little behind in terms of time. I got it blocked quite quickly (in a fantastic royal blue hood) and started to work out the creases as it has a rolled bottom. That was when I got cross and attacked it with scissors, cutting off far more than I should and making life even more difficult for myself. NEVER do complex work when that tired - it's foolish - although I'm sure you all know that one!

There's some detailing on the crown, a little like the block my husband bought me for my birthday and I started to pin that in, but didn't get it complete before the end of the session.

No photos I'm afraid - I didn't remember my camera (I'm quite pleased I remembered all my blocking stuff actually) but hopefuly I'll be better next week. Think I gave a terrible first impression as I was so tired and had had an awful first day back at work, but I've got the next 6 months or so to make that better.

Now to find some "inspiration" for my designs...

Wednesday, 2 September 2009

HOLIDAY!!!

I'm off to America to walk across the Grand Canyon!!! See you in 3 1/2 weeks!

Project 15 - Bumble Bee


This was an amusing one - a scientist who wanted a fairly accurate costume so that he can teach about bees in schools by dressing up as one...

This is a bombus terrestris:

http://images.google.co.uk/images?hl=en&source=hp&q=bombus%20terrestris&um=1&ie=UTF-8&sa=N&tab=wi

and this is his outfit (to be worn with full length black trousers and top and gloves, but it was far too hot for that when I was modelling it...

Sunday, 30 August 2009

Project 14 - Silk - PHOTOS


Well the wedding was fantastic and although I never quite fell in love with the dress (I think it's too much pattern and a little overpowering), I adore the hat. Here's a couple of pics for you


Monday, 17 August 2009

Project 14 - Silk - Update


The hat...first thing was to make bias binding and then stitch it to the sinamay base


Then assemble it and add a hairband. Decoration still to come...


Decorated with the silk and lining fabric with fishing wire stitched in the seams, then ruffled into gorgeous little pompoms

Sunday, 9 August 2009

Project 14 - Silk - Update

The dress is finished!!!

Bought a bias binder maker today and made some up from the silk to edge the hat. It's looking fantastic so far, although I'm hand-sewing so it's taking a while.

Saturday, 8 August 2009

Project 14 - Silk - Update

Where has time gone? When I started this there was AGES to go, and now the wedding's 2 weeks today! Going down to my in-laws next weekend which means I need to finish at least the dress this weekend. And with a social life to fit in

Well, I've got everything cut, have basted all the lining to the silk and done all the gathering - it's amazing how long all that preperation takes!!! Absolutely exhausted, but want to get it at least looking like a dress today, even if I can't get it completely finished off...

Wednesday, 5 August 2009

Project 14 - Silk - Update


okay, a slight deviation - the dress will get my attention at the weekend.

Yesterday I had a vision. It was in the shape of a hat/fascinator and it goes with the dress. So I mocked it up while no-one was looking out of a sheet of paper at work. Here's the mock-up.


then I got home and made that fingernail size mockup into something out of a cereal box that is the right size for my head (using lots of fantastic circle mathematics I thought I'd forgotten)

I was really really happy with that so I got some sinamay today and I've made up the first part of the hat. REally happy with progress so far...

Sunday, 26 July 2009

Project 14 - Silk - Update

oh my oh my oh my - some very very lovely person has sent me some marfy patterns to try before I get started on the "marfy challenge" and I've just had a little play with this dress (third image):

http://www.marfy.it/eng/activenews.asp?idcat=3453&idart=54101&azione=list&layout=

I picked it as it was the only dress and as you may have noticed, I have a teeny bit of a thing about dresses...

well I made it up (incredibly easily - I was surprised - it only took about an hour!!!) just to see how it went in scrap fabric and it's the most beautiful thing I've ever put on!

so little bit of a change in plan - looks like this is what I'm making up in the silk...it's mind blowing and with the drape of the silk it's going to be divine.

Going to rip apart this toile and maybe cut the silk today I'm so excited!!!

Wednesday, 15 July 2009

Project 14 - Silk - Update

I made up the bodice again last night but I'm still not happy with it. Tried doing French seams for the first time because all my research on silk suggested it - a lot easier than I'd expected (even though I felt I was doing things wrong by sewing on the righ side of the fabric) and very useful for lining things up.

Had a go at pinning the seam allowances to check how it looks as I'm not 100% sure about it. I had a second go at expanding it as the 'stretched apart' look of the folds isn't what I was aiming for. Gotta get it right and all...and it's a good learning experience if very frustrating. I'm finding it hard to get my teeth in with only an hour or so an evening available to do work on it.

Oh well it's best to get things right before I start on the silk...

Update: Well, that sort of worked, but I just don't like the shape of the dress now that it's my size. Think I might have a look for a different pattern...

Tuesday, 14 July 2009

Project 14 - Silk - Update

ok, so I finally got around to lengthening the pattern - a good excuse to get my pristine (because it scared me) fitting book out and have a look at what to do.

I had to add 2 inches - there's 2 pleats so I put half an inch above each and an inch below the bottom one. The pattern needed more tweaking than I expected to make the lines match up again, but I think I've done ok.

Hoping to cut that out tonight and redo the toile for the top of it. See if that fits, and if it does I can get on with the real thing (or put it off for another few weeks as I'm scared to cut the silk)

Monday, 6 July 2009

Project 14 - Silk


Well, after years of wandering into Liberty to gaze longingly at the fabric, I finally turned up during the sale and bought myself two metres of this:

I've never held such beautiful fabric and I've certainly never had any clothes made out of something so gorgeous.


As it's the first time I've ever worked with silk, and as it has such a bold pattern I want to make something very simple with it. I have this pattern (used view C for my dress for my Aunt's birthday party) and thought view D would be ideal:

I had to lengthen view C massively (3 or 4 inches in the bodice) when I made it before, and putting the toile together, view D will be the same...BUT...there's no "lengthen or shorten here" line and I'm not entirely sure how to go about it.

Saturday, 6 June 2009

Project 12 - Debbie's Skirt - Update


all finished - I had the fear that it was going to be too small as it looked tiny, but made martha up to her measurements and it looks fine.

Update: Debbie loved it - it's such a treat to be able to give things to my friends and see their smiles

Project 12 - Debbie's Skirt

Well, it's a close friend's birthday this week and we're out tonight so I'm going to make her up this skirt

http://images.patternreview.com/sewing/patterns/newlook/6569/6569.jpg

Got to the market before the stalls were even set up (I couldn't help it, I was excited) and after a walk in the rain got her these two fabrics

About 1 1/2 hours till we're due to go out, probably have an hour or two when we get home - no problem (fingers crossed)

Monday, 23 March 2009

Millinery Course - Week 9

Right, week 9, the final week of my course

I had no idea how I was going to get everything finished, despite having done everything I possibly could at home. Priority was the swirly wirly hat as I needed to use the block to ensure it kept in shape.

So, I unpinned part of it from the top and sewed the ribbon onto the underside of the top part. Then I sewed the top part to the bit it was overlapping. I worked on both spirals together and unpinned as I went. It was every bit as complicated and fiddly as it sounds, especially with working it while it was partially pinned onto the block. HEre's some photos to make that clearer:

I had run across London and arrived and started early, but that's as far as I got. You'll be pleased to know it's now finished and in use - I'd had to finish off the block and it had got a bit big, but I pulled it in a bit with the ribbon inside which makes up the head fitting and it's a bit loose now, but I wore it on Friday night to go to the Hats exhibition at the V&A with my mum photo hasn't been taken yet, I believe and won't do today as I don't want anyone to see how horrific my hair is right now, but I'll get there...

I didn't even touch the straw hat - bought that home as it was - so there'll still be updates on here as I finish stuff off (OK I finished the basic part of the straw hat yesterday, but I haven't decorated it yet - it's come together even better than the felt one did!

The course ended with a display of all the hats we'd made, so here's a bit of that for you:

I'm actually quite glad I bought stuff home unfinished - this course has filled me with so much excitement day in and day out that I'm glad I've got something to play with. Just wish I could afford my own blocks so I could carry on...

[PHOTO LINKS BEING UPDATED]

Thursday, 12 March 2009

Millinery Course - Week 8

So, the penultimate week has been and gone and I can’t believe it’s almost over!

Where to start? Well, I’d rushed out the door that morning and forgotten my trimmings for my straw hat (you may recognise these when they turn up – a certain cream and black polka dot sinamay which I just happened to buy too much of and produced a fantastic hat with from a fabric pattern last week). I was really cross with myself as I needed that for this week.

So what did I do? I resurrected the swirly hat plan . I got a plain black hood, marked a circle on the top, then a 2” wide spiral all the way down it. I cut along the spiral, then blocked the hat making it overlap slightly. Not as much stretch as the others have had, but it looked really funky on the little cloche block and made me very excited. I’m going to line the edge with white ribbon then stitch it all together Hopefully it’ll keep in shape. And hopefully I’ll be able to complete it in just three short hours!!! Not sure how I’ll do it if I don’t have the block to work with though.

Next, the straw hat – I completed the rolling of the edge. That’s not looking as nice as I’d planned, but it was very fiddly. I’m thinking of using the leftover straw that I cut off to make the decorations – not sure how yet, still working on that bit. One of the other girls in the class has the same straw hood but in white and she gave me her leftover bits so I think that could look very funky. I’m thinking of rolling it around hat wire and having some form of abstract thingy going round the hat. Don’t worry if that doesn’t make sense to you – it doesn’t make sense to me yet!

So, more than 3 hours work there, so I bought home the black and blue hat, which I finished last night! I put a matching blue ribbon around it, gathered it in one spot and fastened with the spare button from the coat it’s designed to match. It looks really professional, although the decoration is a little too far back and obscured by the brim. Still, as always we’re the only ones who see fault in our work. I wore it to work today and I’ve had loads of really positive comments including “it looks like a real hat” from my client!

Since Monday I’ve also been shopping for acres and acres of Petersham ribbon and I made the headband for the embroidered cloche last night (I still have the holes in my fingers to prove it). I’m going to roll the remaining straw around wire in preparation for Monday and I’m going to see how much of the embroidery I can get done. It’s going to be a busy week.

[PHOTO LINKS BEING UPDATED]

Wednesday, 4 March 2009

Millinery Course - Week 7

First things first, starting the fourth hat this far in is too much so I've left that one (for now - I'll be back)

Then onto the black felt hat - I sewed the petersham head band in place and tried the crown on again - it's a fantastic fit.

Next job was to sew the crown onto the brim and all of a sudden everything came together and it suddenly became a hat. All the concerns I'd had about things not fitting - it worked! I can't tell you how good it felt

I wore that hat for the rest of the lesson - you couldn't get me out of it. I didn't want to leave it at the end of the night...next Monday it's decoration time and then it's FINISHED!!!

Right, now onto the straw hat. I hadn't shown you the picture of the brim blocked up so here it is:

So first job was to take it off the block and trim the edges. They were trimmed a couple of cm away from the edge, unlike the felt hat which was trimmed on the very edge line.

Next was to bend the wire into the shape of the brim (a much quicker job this time, but still difficult to perfect) and then to colour it with permanent marker so it wouldn't show through any gaps in the straw

Then it was sewn into the crease you can see in the second picture to give the brim its (fantastic) shape

Finally I started to roll the edge of the brim over the wire to make a clean rolled edge. Didn't get far with that though, so that's my first job next week...

Oh, and the one I bought home - I started to embroider that this weekend - here's the process so far:

[PHOTO LINKS BEING UPDATED]
 
/* GOOGLE ANALYTICS - tracking code */