Friday, 26 March 2010

To those who inspire us

I’ve been struggling all week with how to write this post. And I want to dedicate it to everyone who’s ever inspired anyone.

Most people have had a teacher who inspires them, or someone out of school – maybe at work, maybe a friend or someone you’ve met. For me there was Mr Wallington, my Physics teacher in sixth form who turned a fairly academic subject into something real with impact everywhere around me, who inspired such questions as ‘how fast would you have to go for a red light to look green and could you use it as an excuse when caught speeding’ and ‘what exactly does 10 to the power of -23 look like’.

Then there was Toby, my line manager in my first ever Saturday job who was never afraid to muck in if we were short staffed, who always had time for people and always listened to what they had to say, yet was strong and strict and fair. With whom you always knew where you stood and you always knew where the line was and exactly what would happen if you crossed it. So you could get on and do your job without worrying about anything.

And more recently there was Andrew Bristow. The teacher at my first ever millinery course. The man who took ‘I wonder how hats are actually made and if I’d be any good at it’ and turned it into a passion for headwear and for couture sewing techniques. Whose enthusiasm for his work seeped into all his students, who challenged those who needed it and who supported those who were struggling. Who when he couldn’t understand my description of something I wanted to try said simply ‘well, you’d better make it then to show me’, giving me the belief that if I can see a hat I can make a hat (even if I can’t draw it).

And that’s where the tale becomes sad. I was searching the internet last weekend to see what sort of work the people who have taught me my millinery skills have produced, wondering what the styles were that were produced by the different characters when I came across this website, telling me that Andrew died on Boxing Day. Do have a read – the messages left by those who knew and loved him are beautiful. I’d like to leave my own one day, but I’m not sure what to write yet.

I always dreamed that one day I’d be making beautiful hats and I’d have some success as a milliner and I’d catch up with Andrew and tell him how he inspired me, how he was the fan that turned that spark of interest into a roaring fire. How at 25 years old and in his class I finally answered that primary school question of ‘what do you want to be when you grow up’, a question I’d never been able to answer before.


But I will be a milliner, and it will still be thanks to the inspiration of an amazing teacher, and I will never forget him. So raise a glass tonight to whoever it was who inspired you at any time in your life. Contact them and tell them. For these are the people who make our lives what they are and if we don’t tell them, how will they know the impact they had?

Tuesday, 16 March 2010

Earthwatch Mascot


You may remember that I made a bumble bee for a scientist in the Summer, (http://alisonsewing.blogspot.com/2009/09/project-15-bumble-bee.html & http://alisonsewing.blogspot.com/2009/10/project-15-bumblebee-photos.html) which he wore to a charity ball. Well, the organisation who held the ball contacted me a few months later asking if I could make them their own mascot. First off it was a dolphin, then a turtle, then we settled on a giant globe.

This was entertaining to design. They wanted the head of the wearer to be inside the globe, which meant that it couldn’t be suspended from the shoulders. It also needed to be light weight, hold its shape for multiple uses, all sorts of things that appeal to the Engineer in me. I spent quite a lot of time on google sketch-up working out how to do it.


The structure I came up with was based on school PE lessons – 6 hula hoops forming a sphere. This was surprisingly strong and very lightweight. This frame was covered in bubble wrap to give it a more spherical shape. To hold the globe in place when it’s being used, I attached a massive T-shirt to the base of the frame, allowing the frame to be suspended from the base rather than the top. These are supported by a few cords inside, but the majority of the strain is around the edge of the T-shirt. An added bonus here is that this makes the globe fairly comfortable to wear and (if you’re childish like me) you can jump up and down and the bounce in the T-shirt makes the globe jump about


Finally it needed to be decorated. I spent an age forming the blue felt around the shape to make a succession of larger and larger pleats and tucks to turn a 4m length of felt into a sphere. This was by far the most frustrating and fiddly part and the only part I’m not 100% happy with as there’s still some parts where it doesn’t sit as well as I’d like.

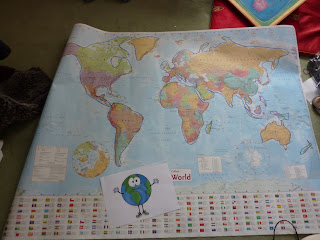
Then it was onto the continents. I bought a giant map of the world and attacked it with marker pen to identify approximate shapes rather than having lots of detail. Obviously, a flat map won’t translate exactly onto a globe so I had to expand things nearer the equator and reduce things nearer the poles. I made the continents up by drawing them freehand on the back of some really ugly Christmas wrapping paper and pinning them to the globe, redrawing or changing the shapes whenever it was required. Eventually I was happy with what I had and I cut the continents out of the green felt.

I’d planned to glue the continents on, but that just doesn’t sit with the way I do things so I ended up hand stitching them all. A massive job, but made all the more enjoyable by watching Pride and Prejudice at the same time (and the fact that I rather enjoy hand sewing). Occasionally Lizzie Bennett’s antics distracted me so much I sewed it to my jeans, but there were no major disasters.

The picture I’d been given as a guide has arms with big white hands, massive eyes and a gorgeous smile. Again, I made these out of paper and pinned them on before cutting out two eye-holes and stitching several layers of white net behind them. (I thought four layers worked best as it made the eyes look quite opaque but didn’t affect the vision too badly.) This is one thing I’d have done differently. I cut out eye shapes from the net and then stitched them behind the eye holes. I should have cut the eye holes and just stitched a big rectangle of net behind as it slipped quite a bit and I had to re-stitch several parts. I added black felt ovals for the pupils and a big smile, also hand stitched.

The hands were made by cutting two massive hands out of white felt and stuffing them with wadding. I made mitten shapes out of white jersey (soft and stretchy) and inserted these, stitching the gloves together.

And finally I slip stitched the edges of the ‘sea’ together to hold the cover in place. It was picked up early this morning and I got a couple of pictures before it went away. It’s going to a conference tomorrow!!!

Sunday, 7 March 2010

I finished the 2/3 size top hat...

...and here it is!!!

The blocks are beautiful. The crown is made up of 5 pieces which screw together which means you can get the block out without stretching the hat. Everything's so beautifully made and fits together so perfectly. The crown was a horror to block - not sure if that's the fairly cheap felt I was using or the fact that the crown is so small, meaning I had to do a lot of shrinking (which is tougher than stretching for me).

Once I'd got that sorted, the brim was easier as I'd already shrunk the head fitting. It's not my neatest blocking attempt, but I was too excited about seeing how it turned out to take my time and do it properly! I've got a lovely baby pink fur hood to do it with next time so I hope that'll come out neater.

I wired the edge whilst babysitting for my friend's little boy (who was good as gold and let me get most of it done) then covered the wire with black velvet ribbon as I wanted something more luxurious-looking than petersham. I used petersham for the head fitting and added a thicker velvet ribbon band. It's held onto the head with elastic.

So, well done for reading, here's your reward - a photo...

 
/* GOOGLE ANALYTICS - tracking code */