Showing posts with label tutorial. Show all posts

Saturday, 7 May 2011

Loving the floaty chiffon tops at the moment - TUTORIAL

I am loving the floaty chiffon tops at the moment (although not when people wear them without a top underneath AT WORK and you have to sit and try not to look at their bra in a meeting...) - they're so elegant, easy to wear and smart.

So this morning, I decided to turn one of the beautiful printed fabrics in my stash into a stylish floaty top.


It was really easy to make so I decided to make a little tutorial of how I put it together.

I used 1m of fabric off the market. This is a cheap plastic georgette with a gorgeous print. I think it cost me about £2 or £3 a metre.

I folded it in half lengthways and then cut a slit in the middle of the folded side for a neckline. I cut it 10" long. Do check at this point that you can fit your head through the slit - mine only just fits!!!


I next trimmed 2" off each side of the fabric - this is to form the belt


I trimmed 12" off the end of each of these strips to bind the neck. I know I should make binding on the bias, but because the neckline's a slit I didn't worry about that. If your neck slit is longer than the 10" I used, make your strips 2" longer than your slit.


These two 12" strips form the binding for my neckline. I didn't make the binding up in advance as there's no way this fabric will hold a crease. What I did was to turn my top so the wrong side was facing out and pin a strip along the front and back edges of the slit.


This is the time to point out that you don't need to do this on a mannikin - I have used that to make the photos clearer.

Now stitch this edge with a normal 1.5cm seam allowance. As you go around, reinforce the corners of the slit by sewing a big rectangle (like a letterbox around you slit).


When you reach the edges of the strips, turn the ends over to give a nice neat finish


Now we need to hide those edges (in the following pictures the top's been turned right way out again although you can barely tell the rights and wrongs from these photos). Turn the strip over the raw edges then tuck the edges of it under to give a nice clean edge. If your fabric's like mine you are going to need a LOT of pins to hold this in place.


You can stitch this on the machine, but I prefer to do this by hand and hide the stitches.


At the corners, reinforce it by strongly stitching the two pieces of binding together


If your fabric will take it, you can press your neckline, but mine won't and I rather like the finish this gives


Next job is the belt. Pin the remaining fabric strips together


Stitch down one side and reinforce the end. Cut the thread from the machine a little longer than the whole belt. Lay this along the seam you've done and enclose it with the other seam. This allows you to pull the belt inside out really easily (sorry, I forgot to get photos of this bit). You can trim the seams before pulling through, but I decided I wanted to carry on that rounded look from the neckline so left all the fabric in there to create bulk. Finish the ends off neatly.

Either put your top on the manikin or on yourself and mark with pins the point directly below the arm pit a little lower than the natural waist line.


Take it off and check everything's lined up right. Replace the pin with a safety pin. Mark the same on the other side. Now check that you can get the top on and off with the pins in place. If not, move them out a little until you can.

Create a button hole where each of the pins is and open it up. Pop the top back on the mannikin or on you and tie the belt around it, lacing it through the button holes


You'll be able to see that your hem at the bottom is looking a bit wobbly (ok a lot wobbly)


Trim your hem to make it all straight (if you're wearing it get someone else to do this for you). I did this by eye. Don't worry too much about how neat you do it, we're going to sort that out in a minute.


Now take it off, lay it on the floor and try not to wince at how messy it looks - that's absolutely fine


As you can see, mine's very different on the left and right sides. Fold it in half down the middle, line everything up really carefully and neaten the edges up into a nice curve. This is where the see-through fabric comes into its own - you can see all the layers at once.


Open it out and make any adjustments you need to.


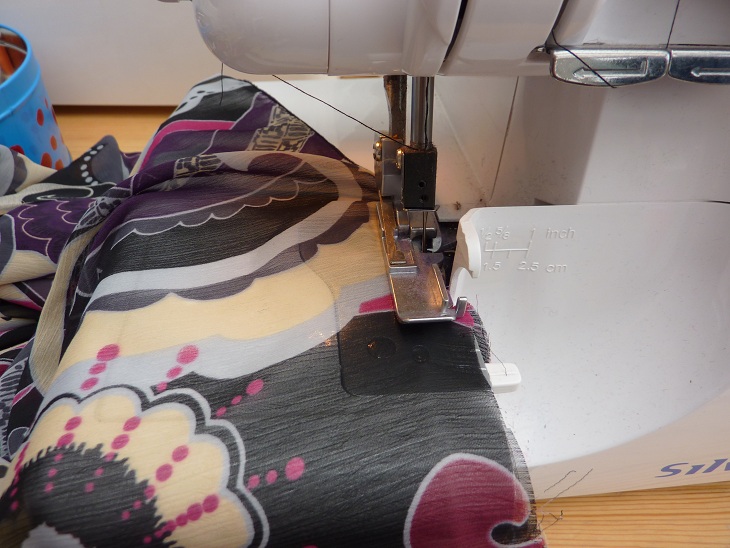
Finally, if you have an overlocker (serger) or the appropriate foot for your sewing machine, finish the edges off with a rolled hem. If you don't a zigzag stitch will do fine. And if you're really keen you could hand-roll the edge or do something else fantastic like that.

And that really is all there is to it. This took me less than two hours this morning to make, and that included the time spent on working out measurements, design and all that. This is a really easy project and I think it looks brilliant. I've been wearing it all day and it's fantastic to wear.


Sunday, 4 July 2010

Making a mini boater - tutorial part 2

Right now ladies and gentlemen, where were we? I believe we'd just blocked the sinamay crown and brim.

First take your sinamay off the block. The easiest way to do this is to cut the cling film and remove it on this, then remove the cling film from the hat. Cut the shape of the brim using the shape you originally identified (I used this plate) and cut the crown by measuring down a constant amount (mine's 2 inches)


Now put your crown onto your brim, with the crown on the outside if that's possible (it's difficult as you've used the same size block for both but stick with it). Try to line up the grain of the sinamay on the crown and the brim. Stitch the two together using a double thread. It goes against what you'd expect, but have the thread showing on the outside of the hat.


If you want to wire the brim, first stitch a bias strip of tarlatan to the edge (or a very small very thin bias strip that's smaller than the trimming you're going to use. Stitch the wire to this. It prevents too much hassle with the sinamay unravelling). I didn't wire this brim as it's so tiny it doesn't really need it. Then stitch your trimming (I've used matching navy cotton bias binding) to the edge of the brim.

(Oh dear, I didn't take a picture of that stage. You'll have to look at a later picture to see that).

Now we're onto trimmings. You can do whatever you want here, but I've made three leaves out of the same sinamay by cutting a leaf shape and rolling the edges. I've made another rose with the fantastic tutorial from Prudence Millinery to go with it. Finally, a bias strip of the same fabric as the flower has been used as a hat band. I've not pressed it too hard so that it sticks up and gives a bit of extra shape to the hat.


Finally we need to attach it to the head. For this hat, elastic would work, but I prefer a hairband. I make mine by bending millinery wire to the shape of my head. Normally I'd make a very small one to be attached with hair grips. I made it a bit bigger this time like a normal hair band but I'm not as keen on that actually.


Now stitch the hat secrurely onto the hairband. This always feels like it's going wrong until all four contach points are stitched and suddenly it's very secure and very comfortable.


All done...it takes a while, but it's so worth it. I wore it out tonight and it's a gem to wear.

In the last few photos it's sitting on the bag I made my mum for her birthday but it's bedtime now so you'll have to wait until later in the week to find out about that.

Thursday, 1 July 2010

Making a mini boater - tutorial part 1

I've had a few queries about how the mini boater was made (and I desparately want my own) so I've decided to make another one and show you how it's done...

I'm making this one with some sinamay I've been dying to use for ages rather than silk-covered buckram, but the concept of blocking it is much the same. The silk covering is a bit more complex - maybe I'll do another of those and show you as well - do you want it?

Ok, to begin with you need to think about the shape and size of the hat. I haven't got a mini boater block so I searched around the house for things that would do. The crown of the hat is blocked on a metal wine cooler and I've based the brim around a side-plate. I needed a flat piece of wood to block the brim on so I've used an old drawer. Here's what I based the hat on:


I covered the drawer and the cooler in cling film (just normal food grade stuff) to protect them from the water and to prevent the sinamay sticking to the blocks. I'm blocking both the brim and the crown in one go, but if you've not done much blocking before I'd suggest doing them separately (do the crown first, then when that's dry take it off and do the brim.


Next I cut out 4 pieces of sinamay. This was as I'm using a patterned sinamay - if I was using a normal one I'd cut out 6 pieces and if I were using buckram I'd cut two pieces. I took the size of my hat (remember the plate) and cut them out an inch or so bigger on each side.


Cut a hole in the middle of two pieces about an inch smaller than the crown block.


Now wet the first layer of sinamay (I use that spray bottle you may have noticed) so that it's nice and flexible. Pull it down over the block, making sure some of it still sticks up - you'll be attaching the crown to this later. Repeat with another layer of sinamay. With 'normal' sinamay this should be at 45 degrees to the first layer and a third should be in same direction as the first. To keep the pattern of mine I blocked just two layers in the same direction as one-another. Secure the centre with a hair band or some elastic.


Pin out four poles using millinery pins like these or household pins (you'll need a thimble to get them in the wood, but they work a treat). Stretch the sinamay flat, but remember to keep your shape.


Now use a few more pins to flatten the sinamay out across the wood. This should be nice and easy as you're just flattening it back to its original shape.


Now that that's done, onto the crown. You'll need the rest of the sinamay. Again get it nice and wet, then drape it over the top of your 'block'. Use another elastic or hair band to hold it in place as low down as you can without missing bits. If you're using three layers of 'normal' sinamay, the middle one should be at 45 degrees to the others.


Now gently ease the folds of sinamay. If you pull it on the bias, it will stretch that way allowing you to form it into the shape of the block. This also gives beautiful patterns which are great fun to play with - go on, have a go.


Now it's time to pour a glass of wine, pop on Film Four and watch the end of The Day After Tomorrow (oh no apparently not - my husband's come down and switched it over to Mock The Week based on the fact we've got The Day After Tomorrow on DVD...he may have a point.

I'll be back at the weekend with part 2.

Wednesday, 2 December 2009

Cow Print Ear Muffs

I've been cycling to the station in the mornings recently and my ears have practically been falling off they're so cold. I don't have any hats that fit comfortably under my helmet and when I've tried that my head gets too hot!!!

Only one solution then, ear muffs.

I got some cow print fabric recently which I've been planning to turn into headwear so I Cut some circles of that, lined it with the very soft plush lining from the wedding wraps I've been doing and mounted them onto a band lined with canvas to strengthen it.

Really simple, but they look FANTASTIC!!! Here they are modelled by a very sexy man on the train this morning (doesn't he look thrilled!!!)

Thursday, 19 November 2009

Making an emergency 50s hat

Talking to my friend at work yesterday (the one who picked out the fantastic colours for my sinamay headpiece at college) she said she'd been invited to a fancy dress party and didn't know what to wear. And the party is TONIGHT!!! She'd decided on 50s with a pencil skirt and fitted top, but she was worried it wouldn't look like she'd made an effort.

Well, there's only one answer to that - any 50s outfit is topped off with a hat. So I offered to "knock her up" a little pillbox hat.

First question, what have I got enough of in my sewing room? The outfit is black and dark red. I have a red hood, but it's not been stiffened, and I'm not sure I can manage a felt hat in an evening...all my sinamay's the wrong colour...I could knock something together with buckram and cover it...the only black I have is polyester lining fabric - that won't stretch nicely, but I could go for this sort of style (this is a beautiful example from an etsy seller):

I decided it "must" be possible to block buckram, but seeing as it's SO stiff I'd soak it in water first. Ended up with completely floppy buckram and a bowl of black water - hmmm maybe that's not the best way forwards...still, it blocked fairly easily (it doesn't have the open weave of sinamay so I didn't manage to get all the lumps and bumps out, but that's no problem as the pillbox would be less than half the height of the block and I had it pretty smooth down to there.

An hour later, after making a delicious roasted veg lasagne recipe here the buckram was still dripping wet (and dripping black all over my kitchen floor!) Out came the hair dryer and I discovered that if you use that on coloured drawing pins, the plastic covers fall off and your kitchen ends up looking like you've had a smartie-masacre!!!

But after all that, a beautiful pillbox shape. It twisted slightly (I guess that's because I only used one layer) so I wired the brim and that pulled into shape nicely.
I then traced the top of the block onto the black lining, added a seam allowance, cut a strip a little longer than the distance round the block and made a tube with the oval sewn to the top. I stitched the top into place so it stretched out, then ran several rows of running stitch down the tube.

When the running stitch was all done, I gathered the fabric and sewed it into place over the wire. It's not great, but it's pretty good for just a few hours' work in the evening (and on the train this morning) - I hope she likes it

Update: She loved it and here she is looking fabulous wearing it:

Tuesday, 17 November 2009

2nd Millinery Course - Week 9

This week we started to have our individual tutorials. I printed off all my diary posts and added in some of the pictures of my research (not nearly enough it seems) along with the other bits I’ve done – spider diagrams, word association, analysis of individual pictures. Then I stuck it all in a folder, loaded up myself with bags of hats (I genuinely hadn’t realised how much I’d produced on the course so far) and proceeded to almost get it all to Fulham Broadway in one piece (a very nasty man tried to squeeze past me, squashed everything and then yelled at me)

I’d brought a hood with me to try some manipulation. First I blocked it on a rounded dome block, pulling it right down to the bottom. Then I released it, lifted it up a little and introduced a fold around the crown. I was going to do more, but I loved the simplicity of it so I pinned that in place and got to work on the brim.

I steamed the brim heavily then started to play with it to try all sorts of shapes. Eventually I settled on having it up on one side and down on the other, with an additional flick down at the top to keep it the right height. I steamed and stretched and compressed all over the place to make it look right and left it in the oven to dry. When it came out it looked like I hadn’t done all the steaming and stretching though – it was wrinkled up again!!!

While I was doing all that, I made up some bias binding in sinamay and started to bind the edge of my headpiece. I was surprised how easily the sinamay was worked around quite tight curves and how smart it looks as it's done.

I had my tutorial right at the end of the evening. The teacher seemed to like my folder, but expected far more photos and pictures and didn’t really look at the rest of the stuff I’d done. I guess I’m taking the wrong approach with my research, but the last time I did a project like this was at school so I know I’m a bit rusty. Oh well, I’ll try to go in a slightly different direction with it from now on.

PHOTOS TO FOLLOW - I'VE BROKEN MY COMPUTER AT HOME SO I'M GETTING A BIT BEHIND WITH THEM
 
/* GOOGLE ANALYTICS - tracking code */