You may remember that I made a bumble bee for a scientist in the Summer, (http://alisonsewing.blogspot.com/2009/09/project-15-bumble-bee.html & http://alisonsewing.blogspot.com/2009/10/project-15-bumblebee-photos.html) which he wore to a charity ball. Well, the organisation who held the ball contacted me a few months later asking if I could make them their own mascot. First off it was a dolphin, then a turtle, then we settled on a giant globe.

This was entertaining to design. They wanted the head of the wearer to be inside the globe, which meant that it couldn’t be suspended from the shoulders. It also needed to be light weight, hold its shape for multiple uses, all sorts of things that appeal to the Engineer in me. I spent quite a lot of time on google sketch-up working out how to do it.


The structure I came up with was based on school PE lessons – 6 hula hoops forming a sphere. This was surprisingly strong and very lightweight. This frame was covered in bubble wrap to give it a more spherical shape. To hold the globe in place when it’s being used, I attached a massive T-shirt to the base of the frame, allowing the frame to be suspended from the base rather than the top. These are supported by a few cords inside, but the majority of the strain is around the edge of the T-shirt. An added bonus here is that this makes the globe fairly comfortable to wear and (if you’re childish like me) you can jump up and down and the bounce in the T-shirt makes the globe jump about

Finally it needed to be decorated. I spent an age forming the blue felt around the shape to make a succession of larger and larger pleats and tucks to turn a 4m length of felt into a sphere. This was by far the most frustrating and fiddly part and the only part I’m not 100% happy with as there’s still some parts where it doesn’t sit as well as I’d like.
Then it was onto the continents. I bought a giant map of the world and attacked it with marker pen to identify approximate shapes rather than having lots of detail. Obviously, a flat map won’t translate exactly onto a globe so I had to expand things nearer the equator and reduce things nearer the poles. I made the continents up by drawing them freehand on the back of some really ugly Christmas wrapping paper and pinning them to the globe, redrawing or changing the shapes whenever it was required. Eventually I was happy with what I had and I cut the continents out of the green felt.
I’d planned to glue the continents on, but that just doesn’t sit with the way I do things so I ended up hand stitching them all. A massive job, but made all the more enjoyable by watching Pride and Prejudice at the same time (and the fact that I rather enjoy hand sewing). Occasionally Lizzie Bennett’s antics distracted me so much I sewed it to my jeans, but there were no major disasters.
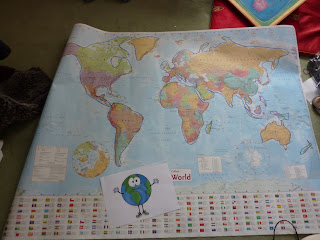
The picture I’d been given as a guide has arms with big white hands, massive eyes and a gorgeous smile. Again, I made these out of paper and pinned them on before cutting out two eye-holes and stitching several layers of white net behind them. (I thought four layers worked best as it made the eyes look quite opaque but didn’t affect the vision too badly.) This is one thing I’d have done differently. I cut out eye shapes from the net and then stitched them behind the eye holes. I should have cut the eye holes and just stitched a big rectangle of net behind as it slipped quite a bit and I had to re-stitch several parts. I added black felt ovals for the pupils and a big smile, also hand stitched.
The hands were made by cutting two massive hands out of white felt and stuffing them with wadding. I made mitten shapes out of white jersey (soft and stretchy) and inserted these, stitching the gloves together.
And finally I slip stitched the edges of the ‘sea’ together to hold the cover in place. It was picked up early this morning and I got a couple of pictures before it went away. It’s going to a conference tomorrow!!!